Tutorial 1: Getting started using the editor
This tutorial will guide you through the basic features of ZGameEditor.
- Start ZGameEditor. The editor automatically opens the project you had open when you quit the last time.
- To start a new project: Select File - New project.
This is what the editor looks like:
The main window is split into the following panels:
- Component tree
- Property editor
- Preview window
- Custom property editor
- Log window
- Toolbar
Let's explain them one by one:
Component tree
This panel displays a tree of the components that the current project contains. This works similar to a folder-tree in a file explorer: you can create folders (Group) and arrange your components in subfolders.
The root of the tree is always the ZApplication component. This represents your application.
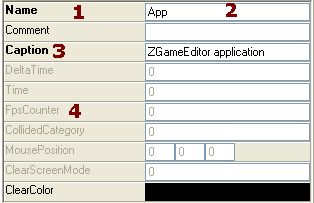
Property editor
When you select a component in the component tree (by clicking on it), that component become selected and the properties of that component is displayed in the property editor panel.
The properties are displayed in a vertical list. When you click on a property, you can edit its value.
- The name of the property
- The value of the property. Click here to edit the value
- When the name of the property is displayed in bold font, it means that the value is changed from the default value. This is useful for remembering what values you have changed.
- Grey text color means that the property is read-only and cannot be changed.
The different types of properties:
- string property: A text value. Just type the new text here.
- floating point number: Type the new value. The "."-character is used as a decimal separator.
- boolean property: this is a checkbox indicating on or off.
- vertex property: three separate floating point input fields for the x, y and z values.
- set property: a dropdown with the different allowed values is displayed.
- color property: the current color is shown, click on the color to open a color select dialog.
- component reference: a dropdown with the names of suitable components in the project are shown, for example "PlayerModelBitmap".
- property reference: editbox where you type the name of a floating point property in another component, example "PlayerModel.Position.X".
When you start to type in a numeric floating point value the edit box changes color to indicate that the value is being changed. Press "Tab" or click outside the edit-box to commit the new value.
Preview window
This window displays different information depending on the currently selected component. The following preview windows can be shown:
- Model/Mesh preview: Displayed when a Model or Mesh component is selected. The 3D-model is displayed. Click and drag in the window to change camera position.
- Bitmap preview: Displayed when a Bitmap component is selected.
- Audio preview/editor: Displayed when a Sound component is selected.
- Application preview: Displayed when the Application component is selected.
The preview window allows you to instantly see the effect of changed values of properties. An example:
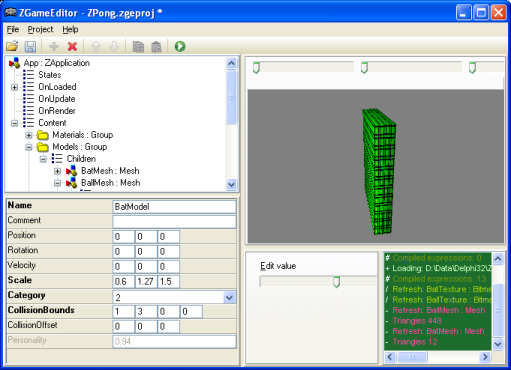
- Select "File" - "Open Project" and choose "ZPong" sample project
- In the component tree: select the "BatModel"-component. It is located under Content / Models / BatModel.
- The player bat is displayed in the preview window
- Now try changing the value of the "Scale"-property, either by typing in a new value "1.5" or using the "Edit value" slider in the Custom property editor.
- You'll see the models scale changed in the preview window.
Pres "F9" now to run the project. You can now play the ZPong game with the different scaled bat. This is how easy it is to try different settings in your game.
Now try another feature Lock Preview.
Lock Preview allows you to preview one component while selecting and editing other components that affect the previewed component.
An example:
- Select the "BallMesh"-component. The ball is displayed in the mesh preview window.
- Right-click the component and select "Lock preview".
- Now select the "MeshSphere" component which you will find under "Producers" on the "BallMesh"-component.
- Try changing the scale-property and watch the scale of the ball change.
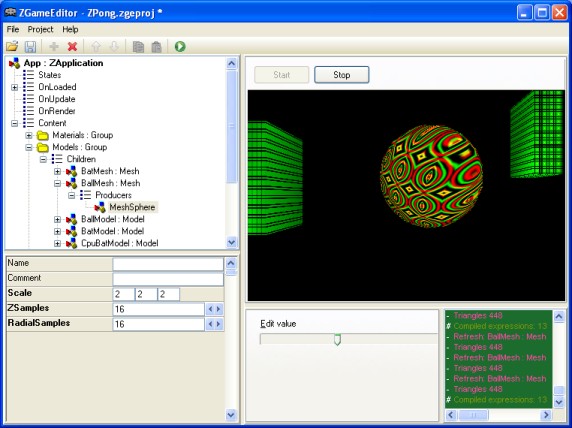
Another example:
- Select the "App"-component at the top of the component tree.
- Right-click the App-component and select "Lock preview".
- Select "MeshSphere" component under Content / Models / BallMesh / Producers.
- Click the "Start"-button to start the ZPong game in the preview window
- Now try changing the scale-property and watch the scale of the ball change while the game is playing.
Shortcut: "Lock preview" can also be selected by pressing Ctrl-S, or holding down "Shift" while selecting components with the mouse.
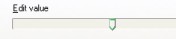
Custom property editor
This panel displays different content depending on the type of property that is currently selected in the property editor.
The following custom editors are available:
- Floating point value slider: A horizontal slide-control is displayed when a floating point number property is selected. Drag the slider to change the value of the property.
- Expression editor: This editor is displayed when an "Expression"-type property is selected. Allows you to edit an expression using a color-syntax text editor.
Log window
This panel displays internal messages from the ZGameEditor-engine. If the editor doesn't behave as you expect, check out the log window. Chances are there is a error message in the log which informs you about the problem.
Toolbar
A standard toolbar for actions that also can be accessed from menues. Hold the mouse pointer over a button for displaying a tool-tip that explains the action of that button.