
|
ZGameEditor Documentation
Community |
Main /
Tutorial2Tutorial 2: The "Hello World" applicationThis tutorial will guide you through making the "Hello World" application, which is simply a program that displays the text "Hello World" on the screen. Displaying textHere is how we will begin:
You will now have a blank project with a single ZApplication-component in the component tree.
This is the command list that is executed each time the application will be rendered (displayed) on the screen. Now add a RenderText-component to the OnRender-node, by following these steps:
Now save your project:
This is how it should look on your screen now: 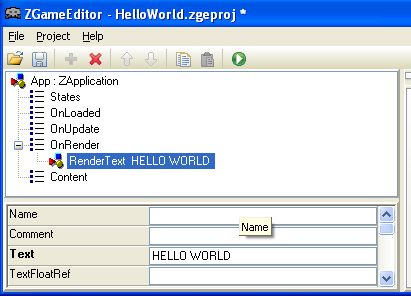 Now run the project by pressing F9-button, or selecting the Run-icon in the toolbar. This is what you will see: 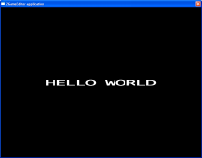 Press Escape to quit the HelloWorld program and return to the editor. Open a Windows Explorer window and look into the folder where you saved your project. You will find the program "HelloWorld.exe". This was created when you selected the "Run" action. Try starting it if you like. The program is independent from ZGameEditor and can be executed on any Windows computer with OpenGL support. 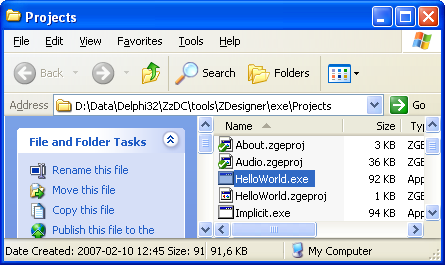 Wait, why is the file larger than 64kb? This is because when you run a game from inside the tool (using F9), they are uncompressed. The size is around 100kb before compression. When you select "Build release" from the menu you will get a small exe-file (thanks to upx-compressor external tool). Return to the ZGameEditor window. AnimationNow we will add some simple animation.
We have created an animator that will smoothly animate the value of our RenderText-components "Y"-property from -0.5 to 0.5. The coordinate system for text is in the range -1 to 1 with 0 being center. Run the application. The text should now smoothly move up and down. Press Escape to return to the editor. User interactionTime to add some interactivity.
 The expression will assign a separate "Y"-value (vertical position) for each letter in the displayed text. The position is dependent on the position of the mouse. Run the application by pressing F9. When you move the mouse up and down the letters follows the mouse. Adding transparencyYou will notice there are ugly borders where the characters overlap. This is because by default graphics in ZGameEditor are not drawn with transparency. Here are the steps to fix that. Add a Material-component:
Add a component that will use the material:
The component tree should now look something like this: 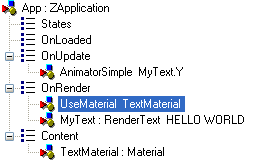 Press F9 to run the application. The text is now rendered with transparency. 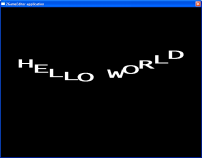 Press Escape to return to the editor. SoundJust for fun, we will now add a simple sound effect. Create the sound component:
Next, add components that will play our sound.
And an expression to change the sound over time:
MySound.BaseNoteNr=24+frac(App.Time)*18;
Press F9 to run the application. You will now here a sound playing. When you move the mouse in the horizontal axis the sound will be sharper or more muted. This is because the expression assigns a value to the sound filter depending on the position of the mouse. That was it! Your first application using ZGameEditor. The tutorial source file can be downloaded here: HelloWorld.zip. |